Install the BorderPass app and select your SKUs
The app connects your store to the BorderPass platform. It sends UAE orders to the warehouse, keeps UAE stock levels in sync and updates tracking. You choose which products it handles.
First, find your API key
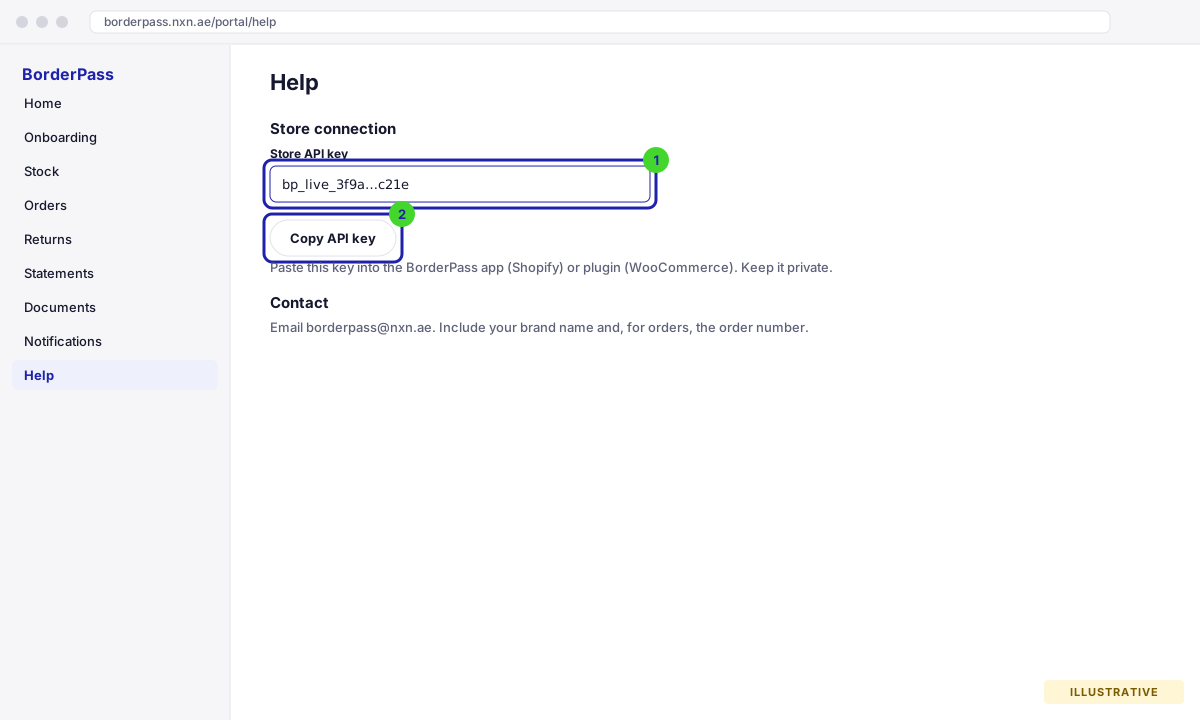
Sign in to the brand portal and open Help. Under Store connection you find your Store API key (it starts with bp_). Reveal and copy it; both the Shopify app and the WooCommerce plugin ask for it. Keep it private: anyone with the key can act as your store.
- Open the install link
Your account manager sends you a link of the form
https://borderpass.nxn.ae/shopify/install?shop=your-brand.myshopify.com. Sign in to Shopify if asked. Shopify lists the permissions the app needs (products and inventory, orders and fulfilments, locations) and asks you to approve them.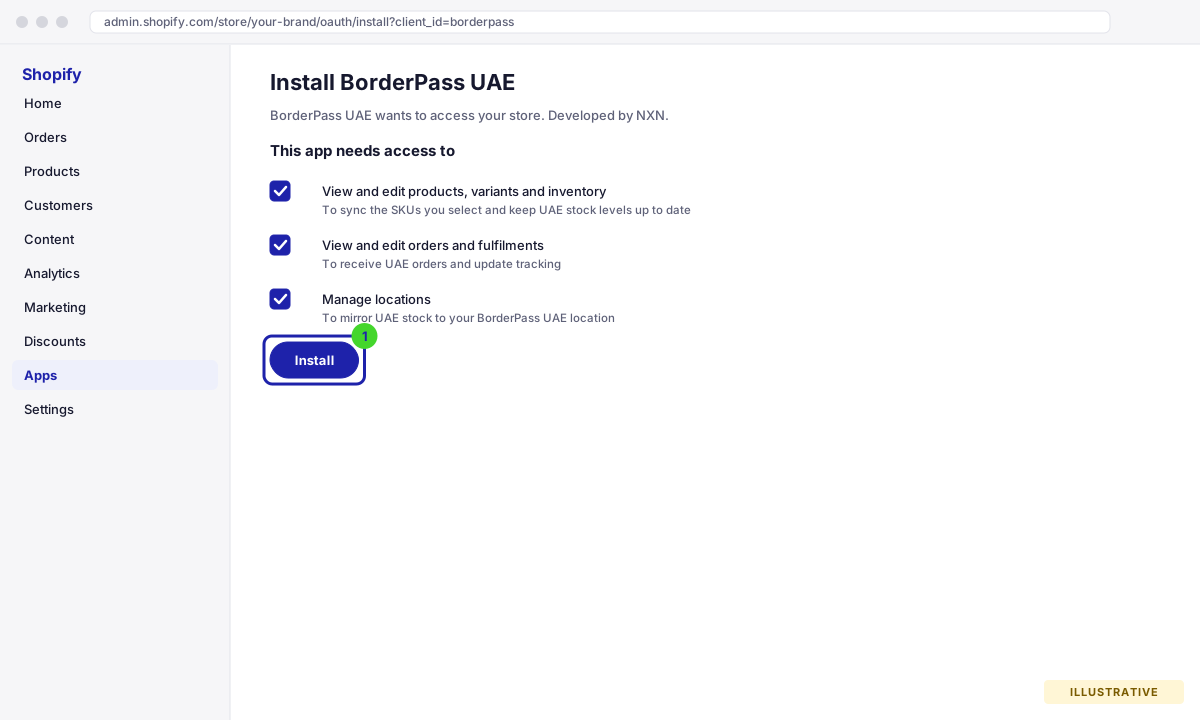
Click Install. Shopify then sends you back to BorderPass to link the store. Illustrative drawing of the screen, not a real screenshot. - Link the store with your API key
After approving the permissions you land on the Link your store to BorderPass page. Your store domain is already filled in. Paste the API key from the portal and click Link store. BorderPass registers the order and product webhooks for you; the page confirms Connected to [your brand] and lists the webhooks it registered.
- Create the BorderPass UAE location if the app asks for it
UAE stock is held at a Shopify location named exactly BorderPass UAE. The app cannot create locations itself, so if the link page shows One manual step, open SettingsLocationsAdd location, name it
BorderPass UAE, use Dubai, United Arab Emirates as the address, save, and re-open the BorderPass app. From then on BorderPass sets the inventory at this location automatically whenever the warehouse count changes. Do not rename it and do not edit its quantities by hand.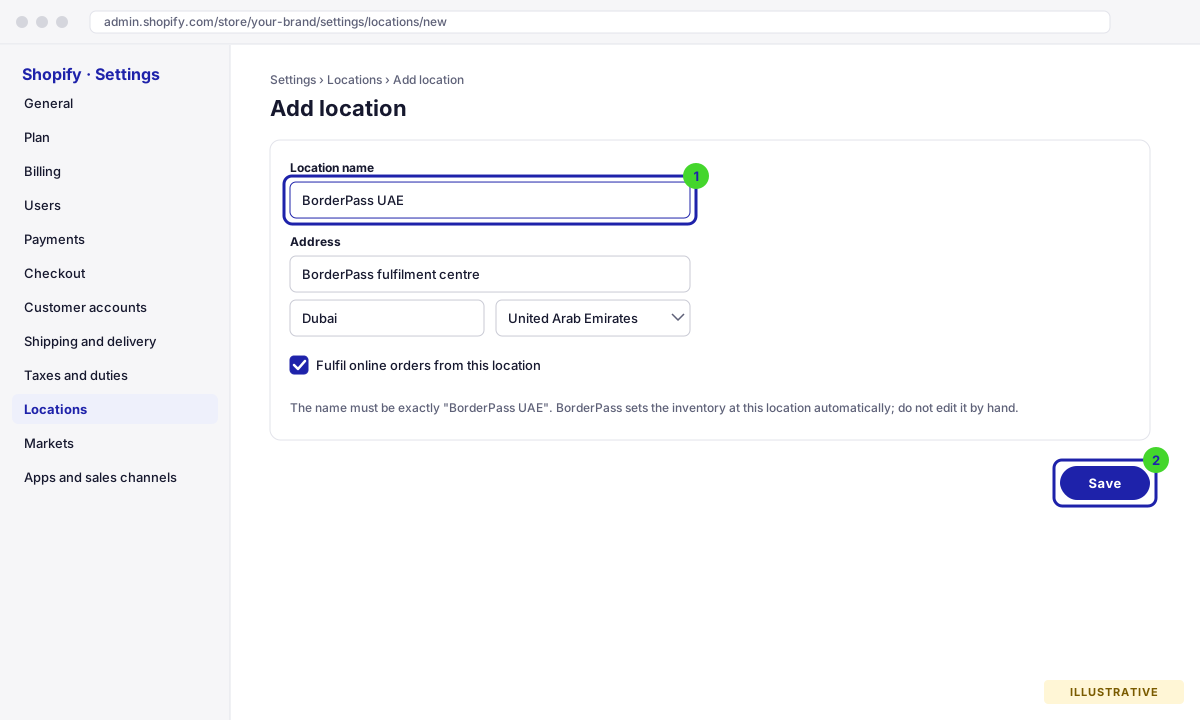
Settings → Locations → Add location. The name must match exactly. Illustrative drawing of the screen, not a real screenshot. - Toggle the SKUs BorderPass fulfils
Open the app from AppsBorderPass UAE. It is a single page: every product variant with a SKU is listed with its UAE stock and a Fulfil via BorderPass switch. Switch on the ones you are sending to the UAE. Each switch saves the moment you flip it; there is nothing else to save. Variants without a SKU cannot be switched on: add SKUs in Shopify first, because the warehouse works by SKU.
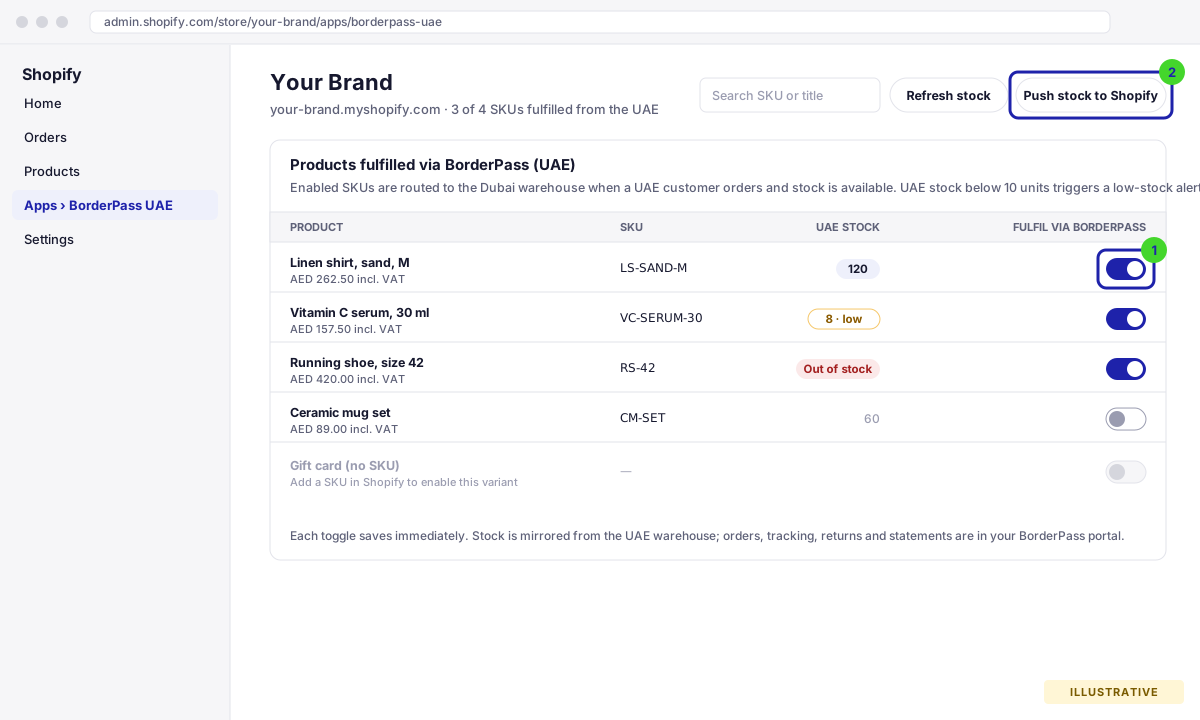
Only switched-on SKUs are routed to the UAE warehouse. Refresh stock reloads the table; Push stock to Shopify rewrites the BorderPass UAE location quantities. Illustrative drawing of the screen, not a real screenshot. - Check inventory tracking
For each selected variant, make sure Track quantity is on in Shopify. BorderPass mirrors the warehouse count to the BorderPass UAE location as soon as your stock is received and every time it changes; Push stock to Shopify in the app forces an immediate rewrite if you ever need one. Keep your other locations for the stock you ship yourself.
- Download the plugin
Download
borderpass-woocommerce.zipfrom borderpass.nxn.ae/downloads/borderpass-woocommerce.zip (also linked from the portal under Help). Do not unzip it. - Upload it under PluginsAdd New PluginUpload Plugin
Choose the zip, click Install Now, then Activate Plugin. The plugin needs WooCommerce 7 or later and PHP 7.4 or later; it tells you if either is missing.
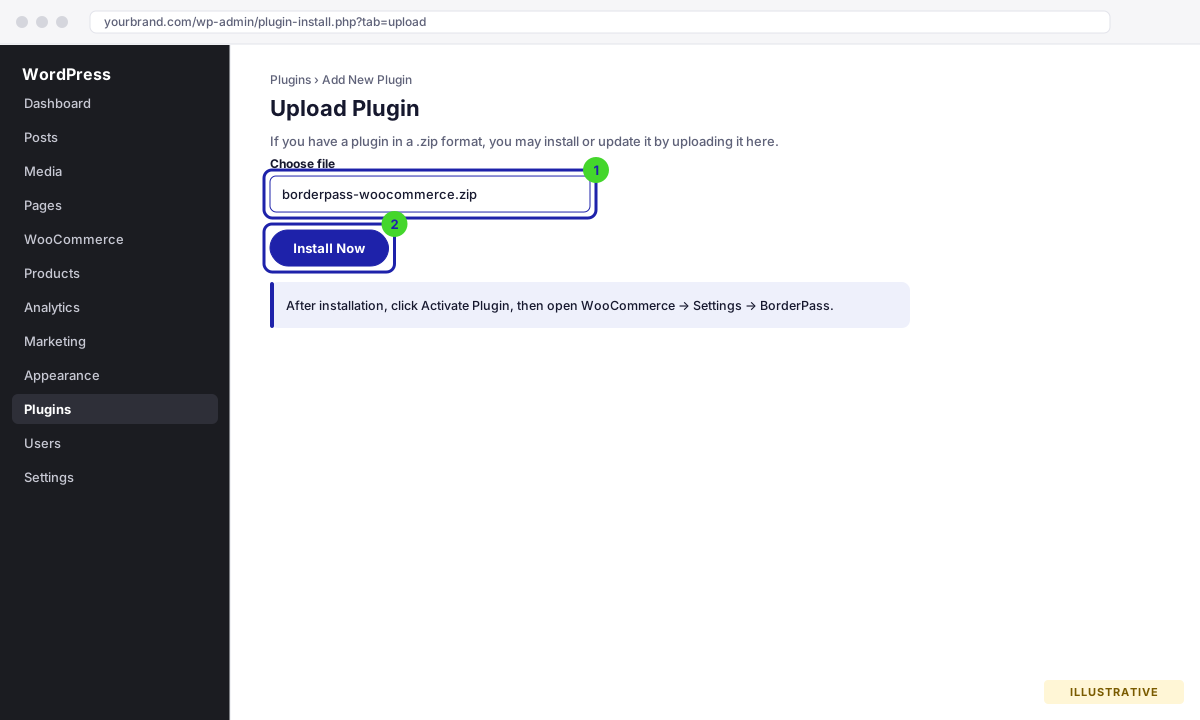
Plugins → Add New Plugin → Upload Plugin. Illustrative drawing of the screen, not a real screenshot. - Enter your API key under WooCommerceSettingsBorderPass and connect
The BorderPass tab has four settings:
- API key: paste the key from the portal.
- API base URL: leave the default.
- Store mode: Main store (global) or Dedicated UAE store, as decided in section 2.
- Merchant-of-Record gateway: leave empty for now. It lists your active payment gateways and is chosen with us on the gateway call (section 6).
Click Save changes, then Connect in the Connection box below. The page shows Connected to [your brand] since [date].
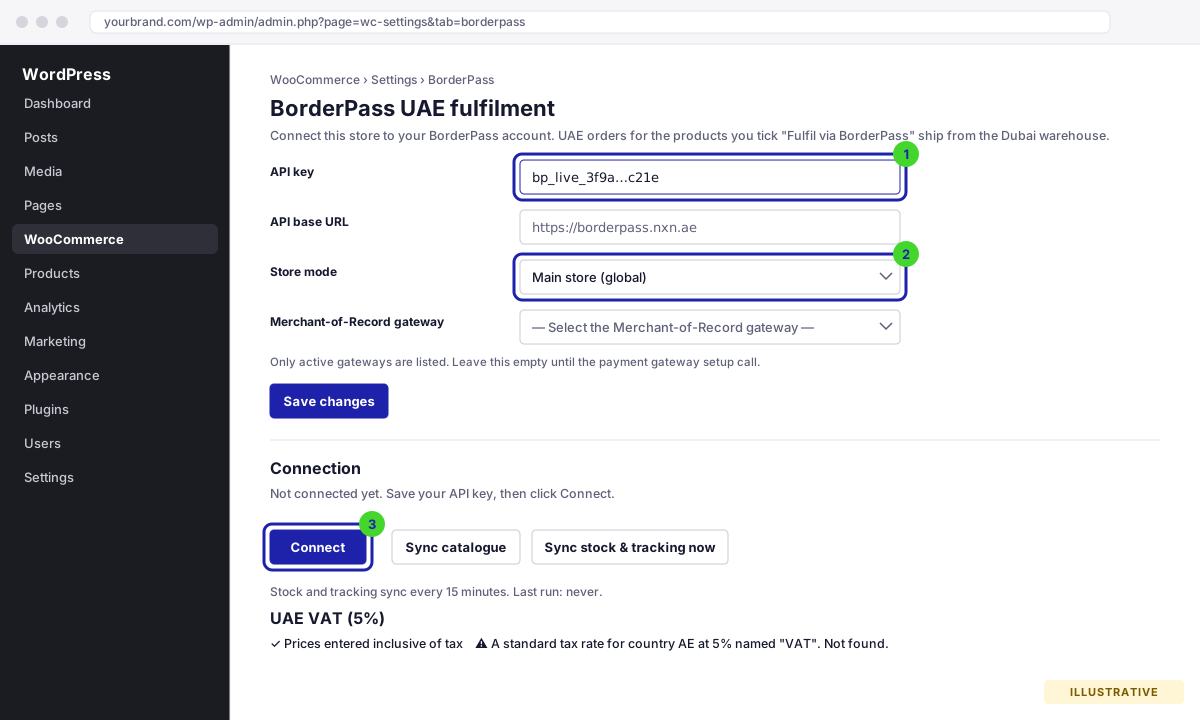
WooCommerce → Settings → BorderPass. The same page shows a UAE VAT checklist (section 5) and the time of the last sync. Illustrative drawing of the screen, not a real screenshot. - Tick “Fulfil via BorderPass (UAE)” on each product
Edit each product you are sending to the UAE. In Product data → Inventory, make sure it has a SKU, tick Fulfil via BorderPass (UAE) and click Update. Saving the product sends the choice to BorderPass immediately. For variable products, every variation needs its own SKU.
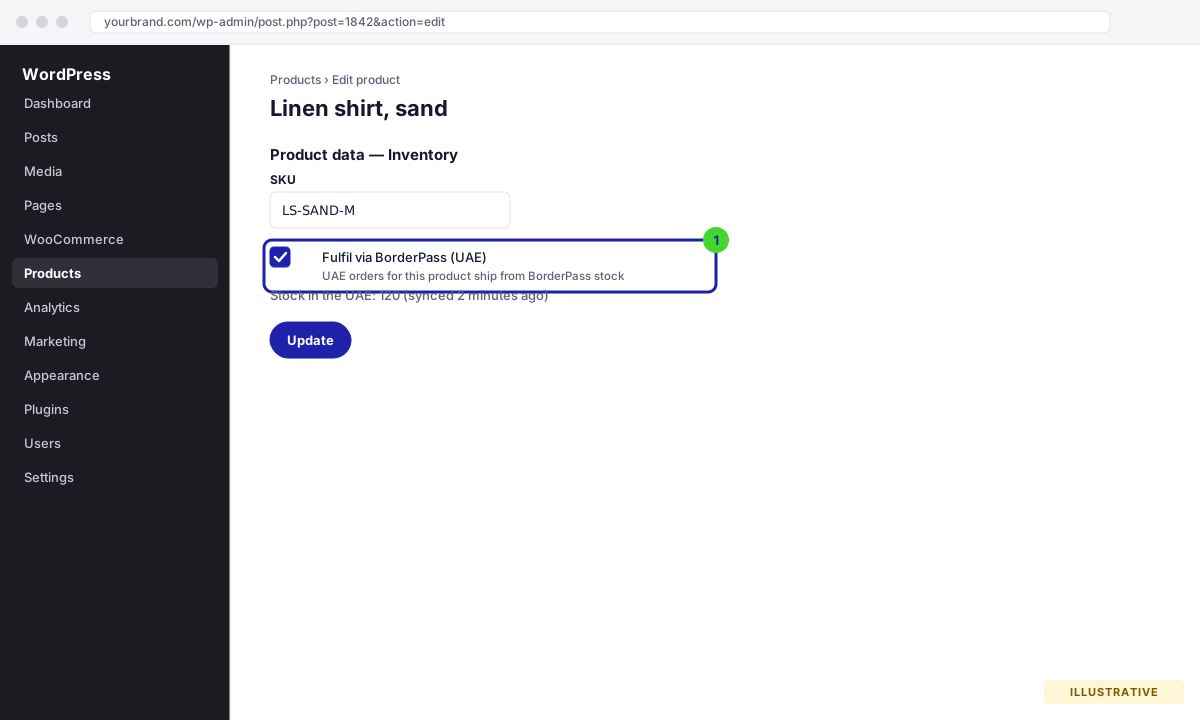
Products without this tick keep shipping the way they do today. Illustrative drawing of the screen, not a real screenshot. - Sync the catalogue once
Back in WooCommerceSettingsBorderPass, click Sync catalogue. This registers all your SKUs with BorderPass in one go and reports how many are enabled. The ticked SKUs appear in your portal under Stock within a minute.
From now on the plugin keeps itself up to date: BorderPass pushes UAE stock to the store whenever it changes and the plugin also refreshes stock and tracking every 15 minutes. Sync stock & tracking now runs that refresh on demand.
How to check it worked
- The portal Stock page lists the selected SKUs (quantity 0 until your shipment is received).
- The portal Help page lists your store domain under Store connection with the status Connected.
- Shopify: the BorderPass UAE location exists under Settings → Locations, and the app header reads, for example, 3 of 12 SKUs fulfilled from the UAE.
- WooCommerce: the BorderPass settings tab shows Connected to [your brand] and a Last run time for the stock and tracking sync.
- Your account manager sees the same list and will confirm it matches your shipment.