Prepare for the payment gateway setup call
Once the store steps are done, your account manager books a 30-minute call to put the Merchant of Record payment gateway into your checkout. Here is how to make it a one-call job.
Before the call
What the MoR gateway does
UAE customers pay Gulf Commerce Services FZ-LLC (“Gulf Commerce”), the Merchant of Record, not you directly. The MoR has a UAE tax registration (TRN 100318265400003) and accounts with local payment gateways: Tap Payments, Ziina, Network International. One of these becomes the MoR gateway in your checkout. Payments the MoR collects, less the 5% VAT it remits and its fee, are paid out to you monthly with your statement of account. Refunds for returns are issued through the same gateway, so the customer gets the money back the way they paid.
For an order to be routed to BorderPass the customer must pay through the MoR gateway, so the gateway is shown exactly when it should be: for UAE baskets that BorderPass will fulfil it is the only payment method; for every other basket it is hidden and your usual payment methods appear. On a dedicated UAE store it is simply the only gateway.
What we do on the call
Your account manager shares a screen and works through these with you. Nothing is changed without you seeing it.
- Install the MoR gateway app
From the Shopify App Store, install the Network International (N-Genius Online) payment app and activate it under SettingsPayments with the outlet credentials we bring: the account belongs to the Merchant of Record, so payments settle with the MoR and appear on your monthly statement. On a main store your existing provider stays active.
- Activate the “BorderPass payment routing” customization
Under SettingsPaymentsCustomizations we add and turn on BorderPass payment routing. It hides every gateway except the MoR gateway when the basket is a UAE basket routed to BorderPass, and hides the MoR gateway otherwise.
- Add the “BorderPass checkout disclaimer” block
Under SettingsCheckoutCustomize we place the BorderPass checkout disclaimer app block above the payment methods and fill in the MoR names and the Consumer Terms link. This is what shows the disclaimer quoted below.
- Add the theme script
Under Online StoreThemesEdit codeAssets we upload a small script,
borderpass-cart.js, and include it intheme.liquid. It asks BorderPass for the routing decision as the cart changes, so the checkout already knows which gateway to show. It does not change how your theme looks. - Test with you
With the gateway in test mode we place an order for the test product to a UAE address: only the MoR gateway should appear, with the disclaimer, and the order should show as Received in your portal. Then a non-UAE basket: your usual gateways, no MoR gateway.
- Enable BorderPass Pay
The MoR gateway is built into the BorderPass plugin: under WooCommerceSettingsPayments we make sure BorderPass Pay (Merchant of Record) is enabled. It is Network International's hosted payment page operated through BorderPass, so there are no gateway credentials to enter in your store and nothing to install beyond the plugin. Customers pay on the gateway's secure page with 3-D Secure and return to your order confirmation; refunds you issue from the order screen go back through the same gateway.
- Confirm it as the Merchant-of-Record gateway
Under WooCommerceSettingsBorderPass Merchant-of-Record gateway is already set to BorderPass Pay (only active gateways are listed); the Checkout section shows whether BorderPass currently runs it in sandbox or live mode.
- Check Store mode
On the same page Store mode must match your choice from section 2. Main store: the MoR gateway appears only for UAE baskets routed to BorderPass and is hidden for everything else. Dedicated UAE store: the MoR gateway is the only gateway.
- Test with you
With the gateway in test mode we add the test product to the cart with a Dubai address: the checkout should show only the MoR gateway, the disclaimer with the Consumer Terms link and the line Prices include 5% VAT. The order should appear as Received in your portal. On a main store we also try a non-UAE address: your usual gateways, no MoR gateway.
Finally we agree the go-live date. The gateway stays in test mode until you have run the test order yourself.
The disclaimer shown at checkout
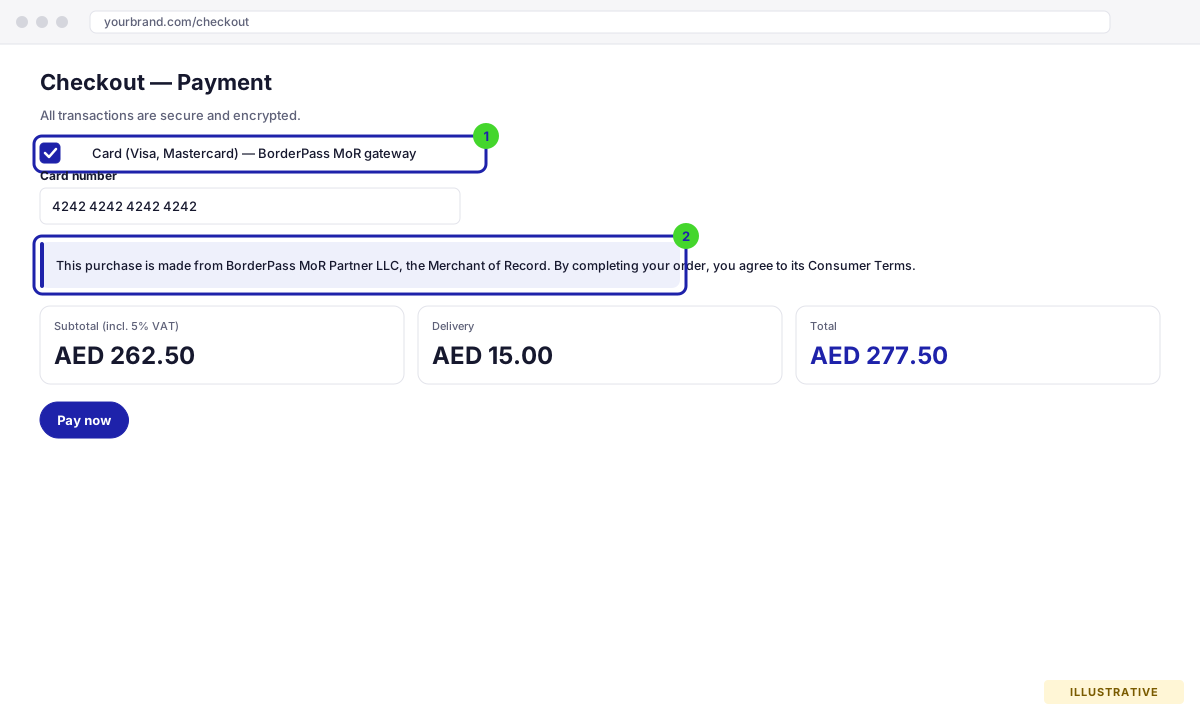
UAE customers must be told who the seller is. For routed baskets the checkout shows this sentence above the payment methods, with a link to the Consumer Terms:
This purchase is made from Gulf Commerce Services FZ-LLC ("Gulf Commerce"), the Merchant of Record. By completing your order, you agree to Gulf Commerce's Consumer Terms.
The Consumer Terms live at borderpass.nxn.ae/consumer-terms. You do not need to write or code anything: on Shopify the checkout disclaimer block renders it, on WooCommerce the BorderPass plugin renders it on both the classic and the block checkout, together with Prices include 5% VAT. under the totals.
Mixed baskets on a main store
If a UAE customer’s basket mixes BorderPass SKUs with products you do not stock in the UAE, the basket is still routed: the BorderPass lines ship from Dubai and the remaining lines ship from you as usual. The MoR gateway collects the whole payment for such an order, and the part that belongs to your own lines reaches you through the monthly statement. That works, but it is the main reason a dedicated UAE store is the simpler option (see section 2).
After the call
Your account manager records the gateway on your brand profile (you can see it under Help → Store connection → Payment gateway (MoR)) and sends a summary with the test order reference and the agreed go-live date. Then it is time for the test order and go-live.